How to Turn Images into 3D Models with Tripo3D? A Complete Beginner's Tutorial
By Subplaza TeamJuly 15, 2026
Turning an image into a 3D model sounds complex, but Tripo3D has already integrated most of the technical steps into a web-based platform. You still need to prepare a suitable image and inspect the structure after generation; the good news is that the entire process can start from a single image, without requiring prior knowledge of traditional modeling.
Before you start: prepare an image better suited for 3D generation
The subject should be complete, preferably not cropped by the image edges.
Keep the background simple, with clear color contrast from the subject.
Ensure even lighting, minimizing strong reflections and transparent materials.
Avoid occlusion of hands, feet, accessories, or multiple objects overlapping each other.
For higher precision, prepare 2 to 4 images from different angles.
Step 1: Upload the image and select a generation mode
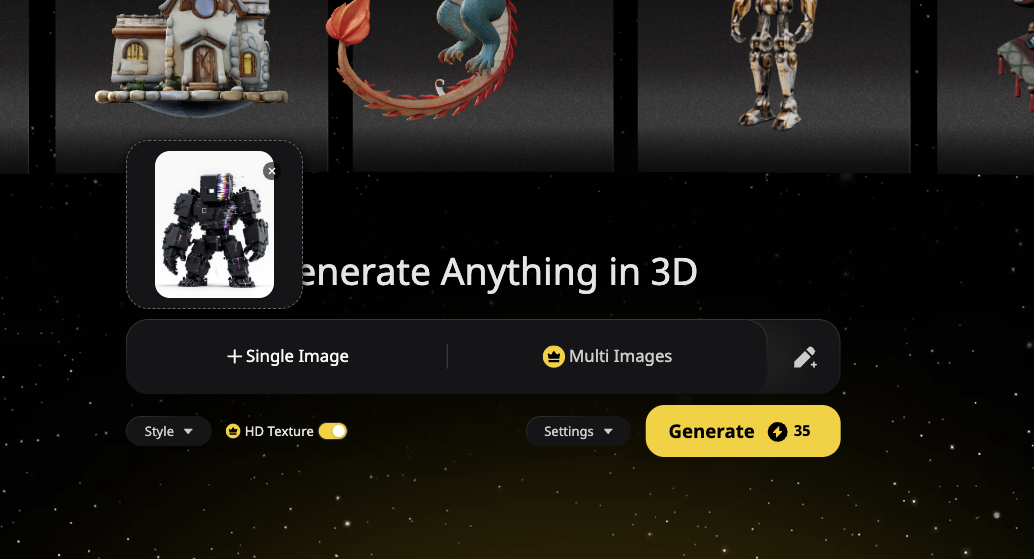
Tripo3D official image upload interface. Beginners can start with the single-image mode.Upload JPEG, PNG, or TIFF in Generate. For a quick textured model, use One-Click; to inspect the mesh first and edit parts, choose Build & Refine. The multi-view mode provides more spatial information and typically recovers the back side better than a single image.
Step 2: Inspect the initial model
Rotate the model to check its silhouette, bottom, back, and small details. Correct structural orientation matters more than good textures. If the subject itself is occluded, the AI can only guess; change the image or add multi-views if necessary.
Step 3: Segmentation, topology, and texture optimization
Step
Recommendation
Segmentation
Separate characters, equipment, and accessories for individual editing
Retopology
Use low polygon counts for games and web; prioritize quads for animation
Texture
Regenerate materials using reference images or text prompts
Magic Brush
Fix only local texture issues without redoing the entire map
Step 4: Automatic rigging and animation
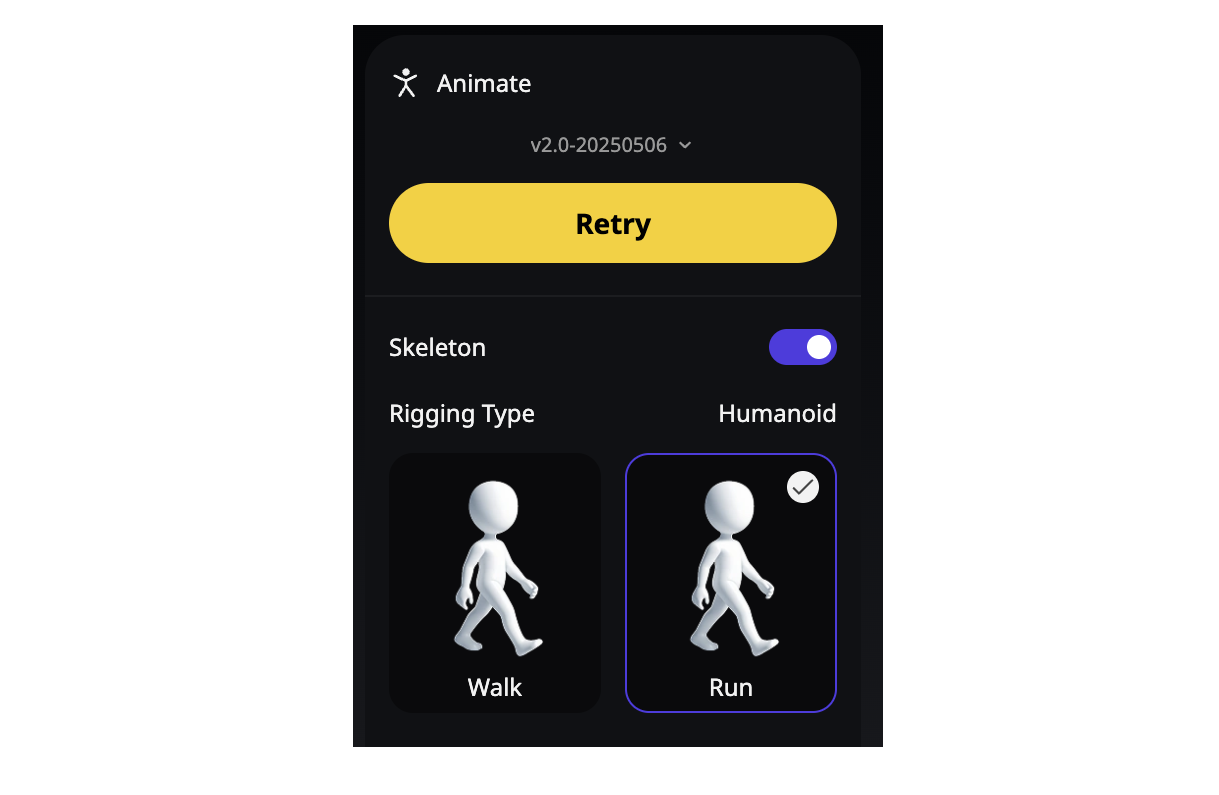
Tripo Studio official Rigging interface; can auto-generate bones and apply actions.After selecting the model, use Auto Rig; the system will create bones and skin weights, then choose an action preset. Rigging works best for clearly structured characters or creatures; for very thin parts, loose clothing, or unconventional shapes, it's still recommended to check after export.
Step 5: Export the model based on intended use
Format
Common uses
GLB/GLTF
Web, AR, and Quick Preview
FBX
Unity, Unreal, Maya, and Animation
OBJ
General Static Model Exchange
STL/3MF
3D Printing
USDZ
Apple AR Workflow
Common Failure Causes and Solutions
Backface Error: Add side and back multi-views.
Widget Adhesion: Use a simpler background and increase subject clarity.
Blurry Textures: First check UVs, then use high-quality textures or local fixes.
High Polygon Count: Use Smart Low Poly or set a polygon limit.
Print Failure: Check for closed mesh, base, and wall thickness before exporting.
For continuous generation, you can start with Subplaza
If you plan to continuously create game assets, printable models, or animated characters, the free quota may run out quickly. Subplaza's Tripo3D plan is more suitable for users who want to complete a project within a defined timeframe. It is recommended to purchase and batch-test a small number of assets first, ensuring the geometry and export workflow meet your needs, before scaling up production.
Frequently Asked Questions
Which should I choose: single image or multi-view?
Single image is good for quick prototyping; when higher demands are placed on the back, proportions, and details, multi-view is generally more stable.
Reference Sources
Steps and accompanying images are from the official Tripo Image-to-3D and Studio Tutorial, verified on July 11, 2026.